How to take and share a screenshot
This post will go over how to take screenshots on various hardware and operating systems (OS), including:
Windows

Save the image as a picture.
2. Using the Print Screen
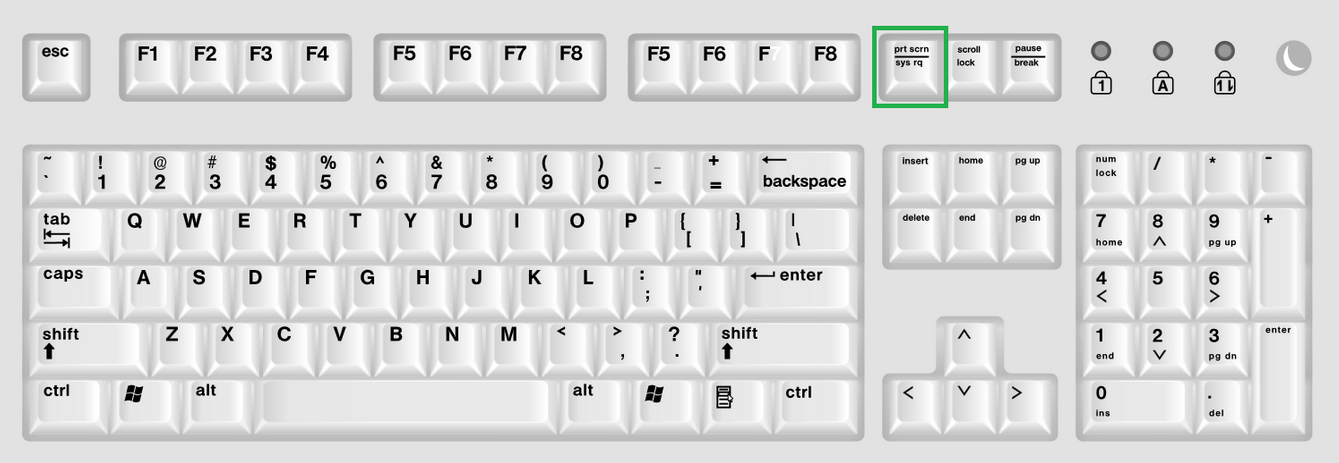
Find and click the PrtScr button, which is often situated directly above the Insert, Home, and Page Up buttons on a conventional keyboard. The PrtScr button, however, might be difficult to see if you use a laptop, so check at the very top right of your keypad:
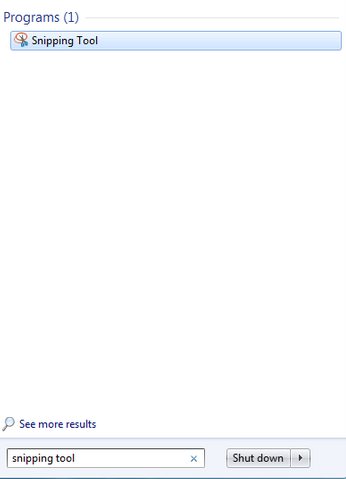
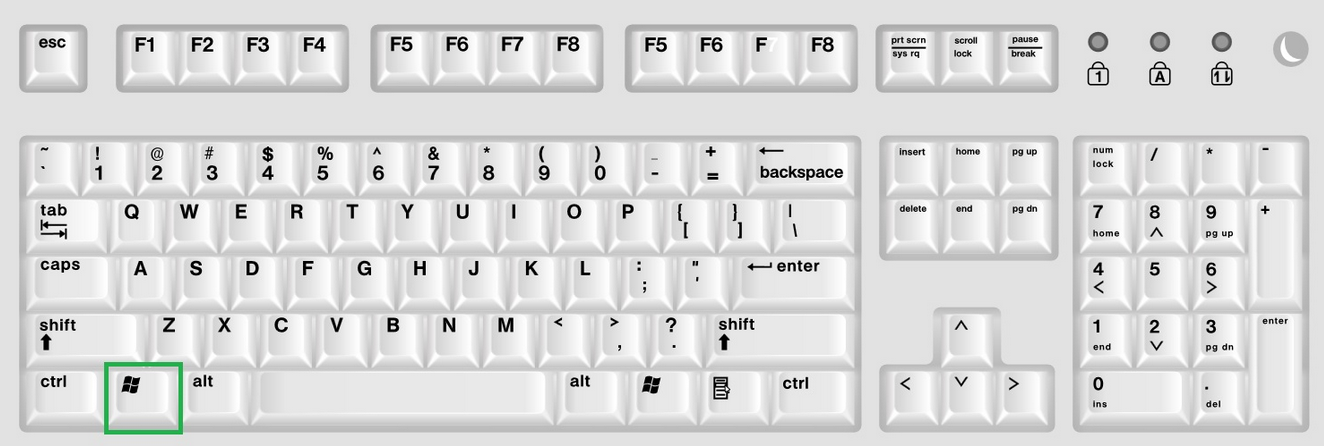
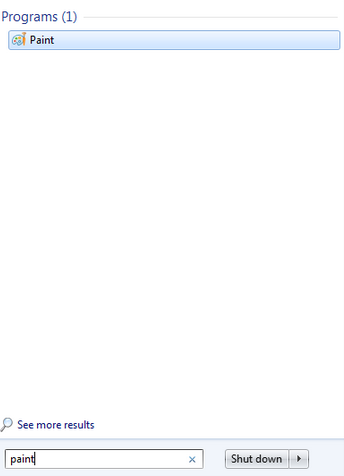
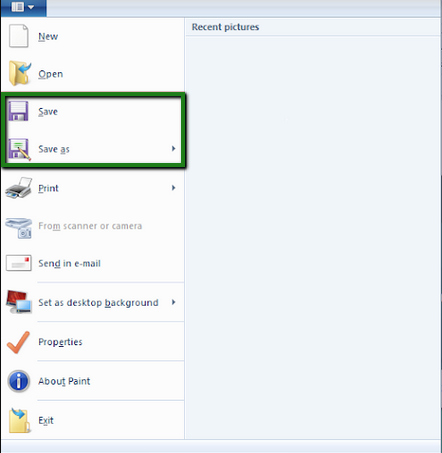
Once clicked, the screenshot is copied to the clipboard. Now, click on the Win and enter Paint:
Select Paint from the search results and paste the screenshot by typing in the keyboard combination Ctrl + V:
MacOS
If you use MacOS, you may choose from the following screenshot options:
1. Capture the entire screen
Press and hold the shift key while typing Command + 3. The screenshot will show up on your desktop when it has been clicked:

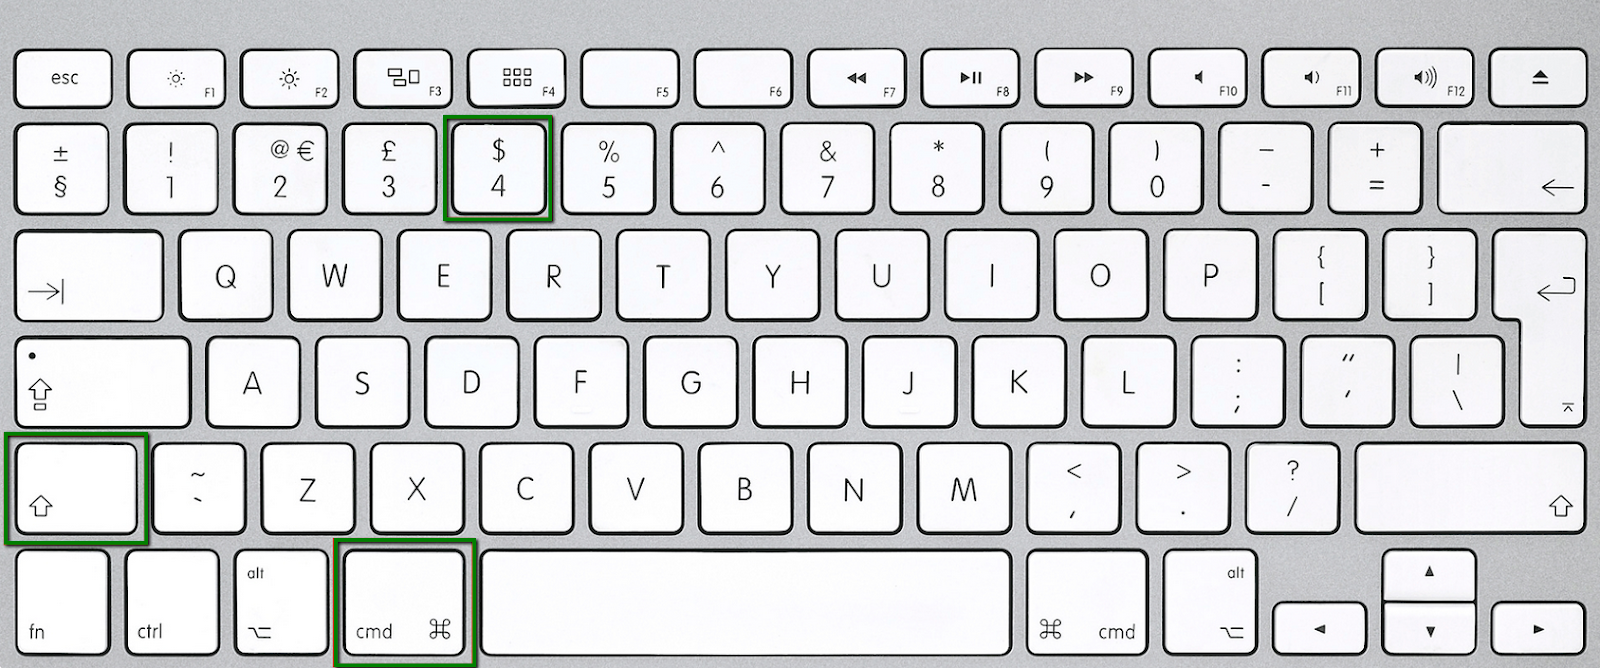
2. Capture a part of the screen
Press Shift + Command + 4. This will turn your cursor into a crosshair:
Move it to where you would like to start your screenshot.
Drag the cursor to capture the required section of the screen.
Once the needed area is selected, release the trackpad or mouse. The screenshot will be saved on your desktop.
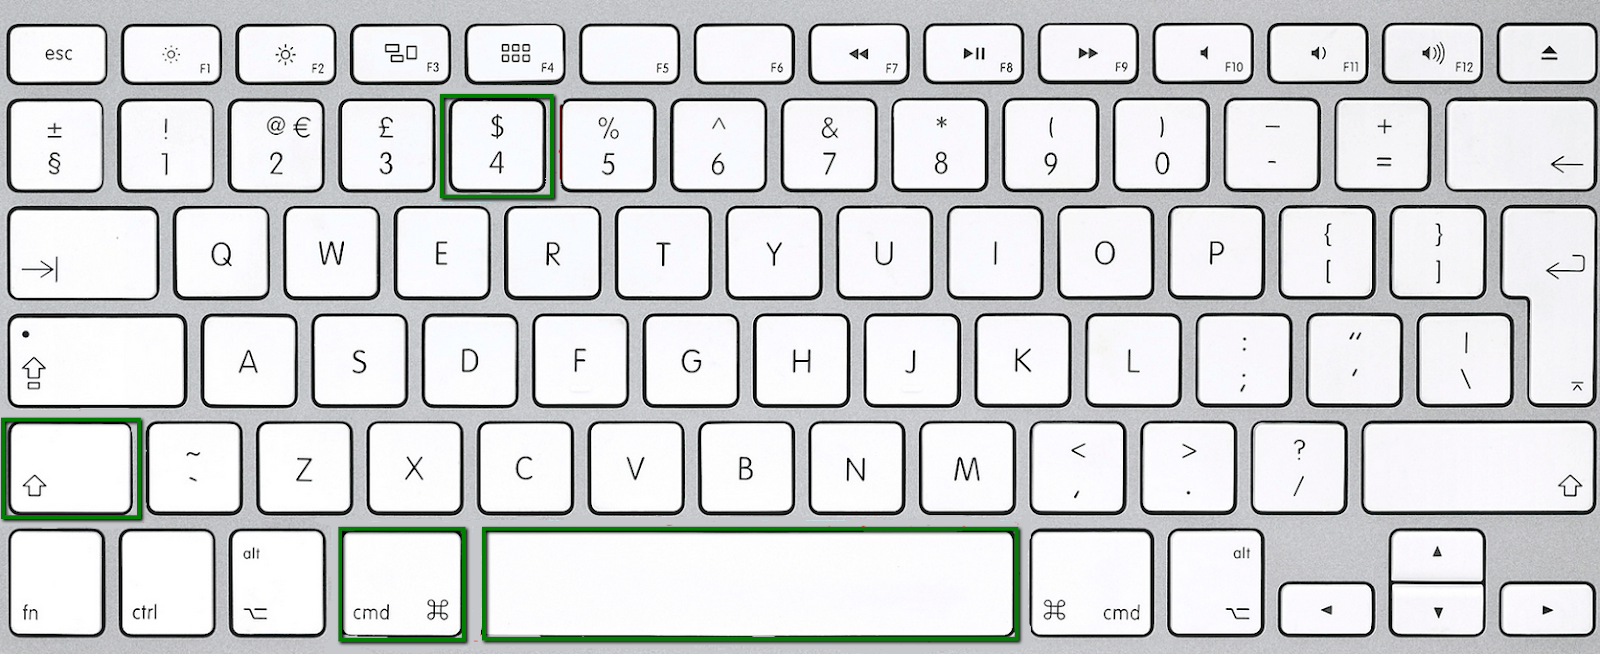
3. Take a screenshot of a specific window
Press Shift + Command + 4. Then press the Spacebar. This will change the crosshair into the camera:
Move the camera over the window you would like to capture. Please make sure that the window is highlighted.
Click on your mouse or trackpad to take a screenshot.
After that, the image will appear on your desktop.
PLEASE NOTE: Your Mac use the filename "Screen Shot date at time.png" when it automatically saves a snapshot.
Android
If you are using a mobile device and you need to capture your screen to share it, please use one of the following combinations:
The screen should flash or somehow indicate the succession of the action. Your device will capture the whole screen and save it as a photo.
Once the screenshot is made, you can find the image in your Gallery or Photos app.
You can download and install the dedicated screenshot software if none of the other versions work for you. With all the capabilities needed to make and distribute screenshots, the most of them are free.
iOS
1. Taking screenshots on iPhones X, XS or XR
If you have iPhone X, XS or XR, please do the following to take the screenshot:
The screen of your device will flash and the captured image will be saved as a photo on your device.
2. Taking screenshots on iPhones SE, iPhone 1-8, iPad and iPad Touch
For iPhones SE, iPhone 1-8, iPad and iPad Touch, the process is slightly different and you need to follow these steps to capture the screen:
How to share the screenshot
You have to send the screenshot to one of our customer support agents so they can review it as soon as you take it. Currently, sharing the screenshot through a chat window is not feasible; however, there are other ways to share it:
Send the captured image via email
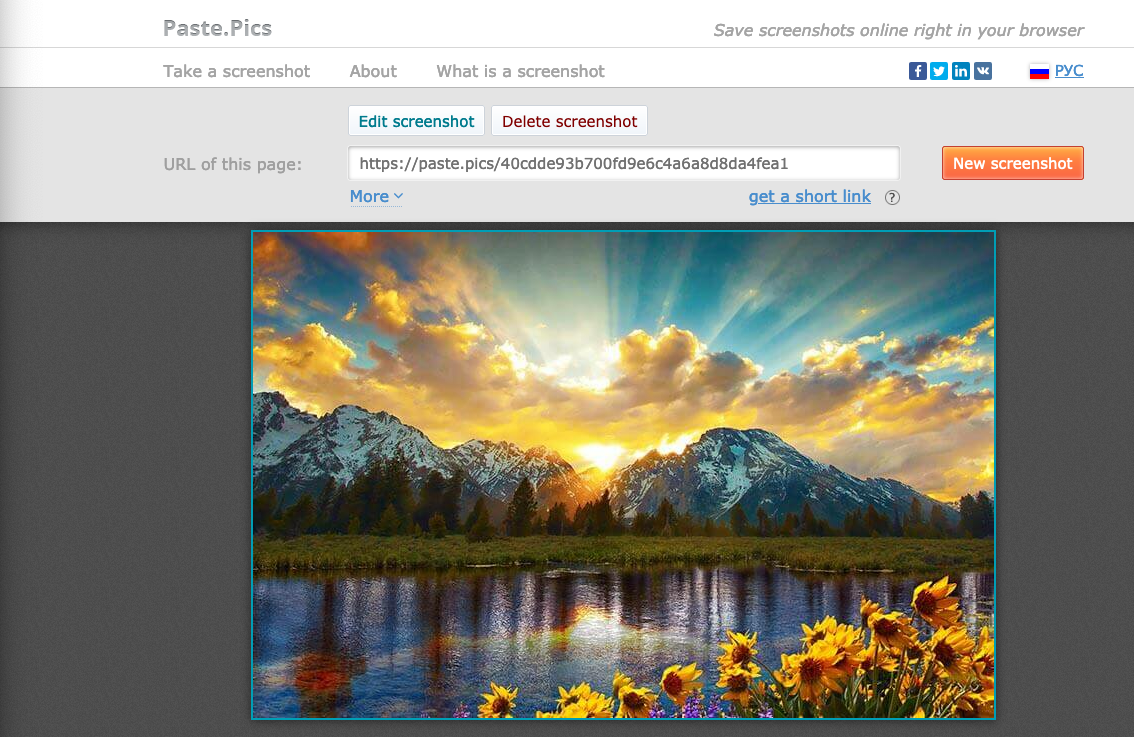
Yes, one of the easiest ways to share the screenshot is to send it to support.zeronoon.com.
Once the image is uploaded, it will take you to a page where it will provide you a url that you can provide to others.
Alternatively, you may click Edit screenshot to customize the image. For example you are able to add a arrow to the image.
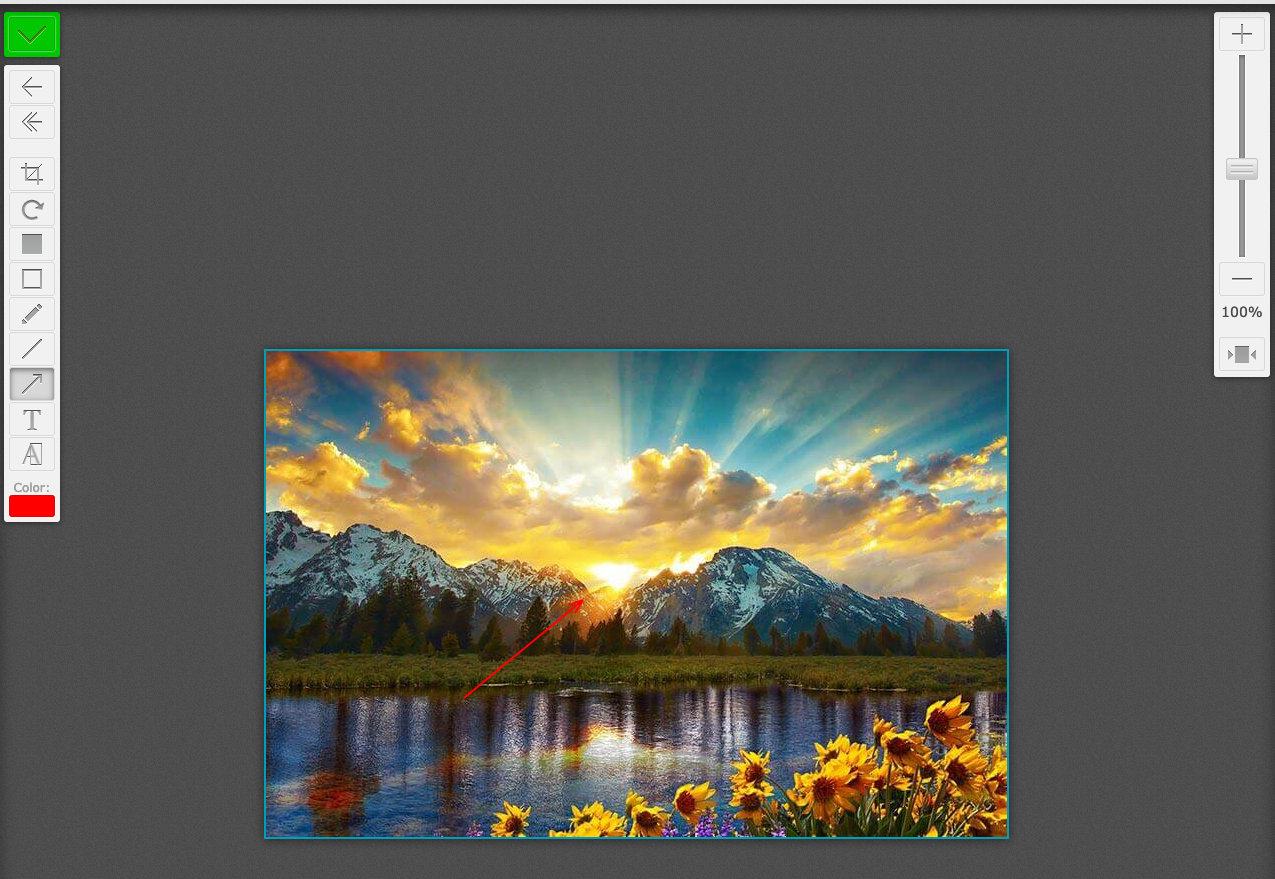
To save any changes you made to screenshot you can click on the green check mark on the top left corner.
This URL can be later pasted into the chat window, so our Customer Support Team members can check your screenshot.
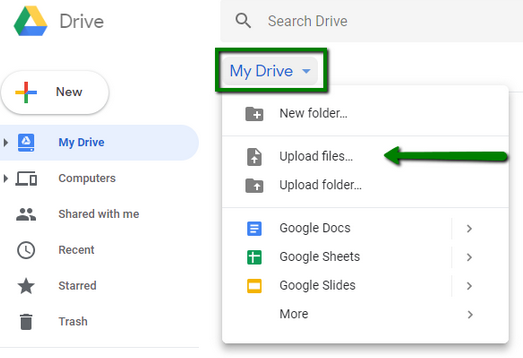
It is one of the instruments you can use to share screenshots with our Customer Support Team. If you would like to use Google Drive for sharing screenshots, please follow these simple steps:
Once in, you can either drag-and-drop the image to your drive or choose the corresponding option to upload the image:
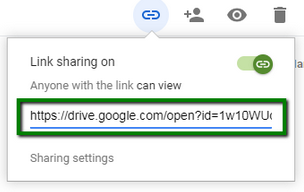
At the top right, click on Get shareable link:
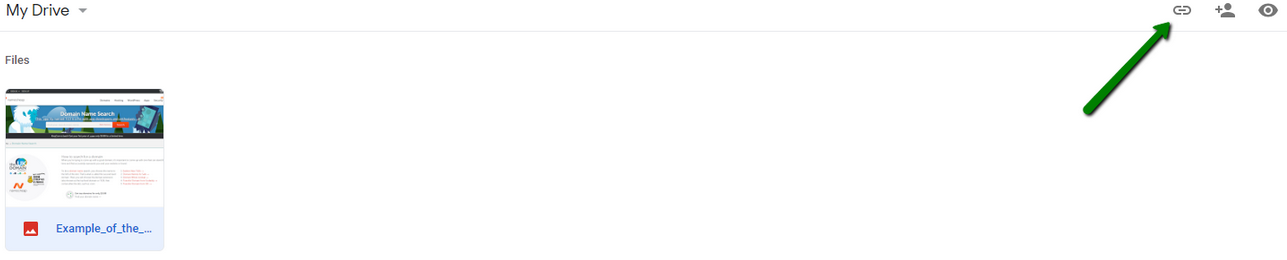
Once the link appears, copy and paste it into the chat window:
Related Articles
DNS Basics
The address given to a domain name to direct it to the server hosting your email addresses or website is known as DNS (Domain Name System). The term "the phonebook of the internet" is frequently used to DNS. Human-friendly host names are converted to ...
What is Shared Hosting?
A shared hosting plan is a kind of service where several websites are hosted on one physical server. Because so many people share the server's resources, this kind of hosting is inexpensive. This is the most economical option for small businesses to ...
Troubleshooting Email DNS with Webmail
Of course! In order to resolve DNS (Domain Name System) problems with webmail, you must examine and confirm the different DNS entries connected to your domain. This is a step-by-step tutorial to assist you in locating and fixing any possible DNS ...
MultiPHP INI Editor in cPanel
Making modifications to the php.ini file might occasionally be useful in order to specifically alter PHP settings for particular scripts. One unique file that can be used to easily change the server defaults for PHP settings on a particular website ...
What is an Entry Process and a Process Limit?
After logging into cPanel, you saw a few items on the right side of the screen that are highlighted in red. What are these? A process is any concurrent action or operation that is being performed by a user. The cPanel on our shared servers is ...